Step-by-step application guide

 Right-handed
 Left-handed

Regular

Inverted champagne bottle

Fibrosis

Calf muscle wastage

Edema
Leg type
Inverted champagne bottle

Venous hypertension can be associated with the formation of fibrin around the capillaries, with fibrosis and hardened skin in the gaiter area. This leads to a distorted leg shape.
We refer to inverted champagne bottle shape where the circumference of the upper calf is much bigger than that of the ankle
Leg type
Fibrosis of the ankle

Venous hypertension can be associated with the formation of fibrin around the capillaries, with fibrosis and hardened skin in the gaiter area. This leads to a distorted leg shape.
Leg type
Calf muscle wastage or areas at risk

Some areas (tibial crest, Achilles tendon, bone protusions…) are at risk of excess pressure, especially with patients presenting very thin legs or calf muscle wastage.
Leg type
Oedema

Venous hypertension can cause oedema as the fluid and waste metabolites are unable to be re-absorbed back into the venous system.
Step-by-step application guide
Step-by-step application guide
of
Measure the ankle


To choose the correct size, measure the ankle circumference, approximately 2 cm above the malleolus.

If the oedema is too big, you may need to palpate the leg to find the malleolus

More information on dressing:
UrgoStart Plus treatment range dressings are recommended by National Institute for Health and Care Excellence (NICE) in first intention for leg ulcers. (same illustration as FAQ)
Source : National Institute for Health and Care Excellence (NICE), UrgoStart for treating leg ulcers and diabetic foot ulcers,
https://www.nice.org.uk/guidance/mtg42, April 2023
of
Shape and Protect the leg
After the dressing has been applied on the wound and before applying the compression bandage, examine the shape of the leg and identify any areas at risk of excessive pressure (bony prominences).
If necessary, apply wadding such as K-Soft on the leg to ensure you achieve an inverted cone shape – smaller on the ankle and gradually wider up to the calf muscle – and to protect any bony prominences (tibial crest zone, malleolus and the dorsiflex).

Steps
DISCLAIMER: If the patient presents severe oedema or lymphoedema with skin folds, we suggest using a single-layer inelastic compression bandage.
of
Protect the leg
After the dressing has been applied to the wound and before applying the compression bandage, examine the shape of the leg and identify any areas at risk of excessive pressure (e.g., bony prominences).
If necessary, apply padding devices (e.g., foam, wadding, cushions) to the leg to protect any bony prominences (such as the tibial crest zone, malleolus area and dorsiflex).

Tibial crest zone
You can either cut a length of soft wadding and apply it vertically along the tibial crest, or apply the wadding in a spiral around the leg, depending on your local guidelines and your own clinical judgment.
Malleolus and the dorsiflex
Apply two turns of soft wadding around the ankle to encompass both the malleolus and the dorsiflex.
Steps
If your patient has:
A regular leg shape
Minimal oedema
None to low wound exudate level
Is willing, and able to self-care
The indicated Urgo Medical product is Altipress
Available as a Standard or Made-to-Measure Leg Ulcer Hosiery Kit (40 mmHg)
More information
https://measurego.co.uk/by-product/class

of
Shape and protect the leg


After the dressing has been applied on the wound and before applying the compression bandage, examine the shape of the leg and identify any areas at risk of excessive pressure (bony prominences).
If necessary, apply wadding on the leg to ensure you achieve an inverted cone shape – smaller on the ankle and gradually wider up to the calf muscle – and to protect any bony prominences (tibial crest zone, malleolus and the dorsiflex).

Steps
Why shaping the leg?
Venous leg ulcer healing requires application of therapeutic compression, enabling the blood to rise from the bottom to the top of the body.
To enable blood to move up along the leg, compression should be degressive from the ankle (~40 mmHg) to the knee (~20 mmHg). For this, the patient’s leg should be shaped like an inverted cone. If this is not the case, a padding device (foam, wadding, cushions, etc.) may be used to re-form an inverted cone shape
of
Shape and protect the leg


After the dressing has been applied on the wound and before applying the compression bandage, examine the shape of the leg and identify any areas at risk of excessive pressure (bony prominences).
If necessary, apply wadding on the leg to ensure you achieve an inverted cone shape – smaller on the ankle and gradually wider up to the calf muscle – and to protect any bony prominences (tibial crest zone, malleolus and the dorsiflex).

Steps
Why shaping the leg?
Venous leg ulcer healing requires application of therapeutic compression, enabling the blood to rise from the bottom to the top of the body.
To enable blood to move up along the leg, compression should be degressive from the ankle (~40 mmHg) to the knee (~20 mmHg). For this, the patient’s leg should be shaped like an inverted cone. If this is not the case, a padding device (foam, wadding, cushions, etc.) may be used to re-form an inverted cone shape.
of
Shape and Protect the leg


After the dressing has been applied on the wound and before applying the compression bandage, examine the shape of the leg and identify any areas at risk of excessive pressure (bony prominences).
If necessary, apply wadding on the leg to ensure you achieve an inverted cone shape – smaller on the ankle and gradually wider up to the calf muscle – and to protect any bony prominences (tibial crest zone, malleolus and the dorsiflex).
Steps
Why protecting those areas? Which ones?
It is sometimes necessary to use padding devices (foam, wadding, cushions, etc.) to protect areas at risk of excess pressure (bone protrusions) to avoid possible lesions. These excess pressure areas are frequently located on the tibial crest, Achilles tendon, dorsum of the foot or other vulnerable tendons.
of
Measure the ankle again
If you have had to apply excessive wadding to shape and protect the leg, measure again the ankle circumference, approximatively 2cm above the malleolus, to make sure you selected the correct kit size.
Steps
If the oedema is too big, you may need to palpate the leg to find the malleolus.
of
Measure the ankle again
If you have had to apply excessive wadding to shape and protect the leg, measure again the ankle circumference, approximatively 2cm above the malleolus, to make sure you selected the correct kit size.
Steps
If the oedema is too big, you may need to palpate the leg to find the malleolus
of
Measure the ankle again
If you have had to apply excessive wadding to shape and protect the leg, measure again the ankle circumference, approximatively 2cm above the malleolus, to make sure you selected the correct kit size.
Steps
If the oedema is too big, you may need to palpate the leg to find the malleolus.
of
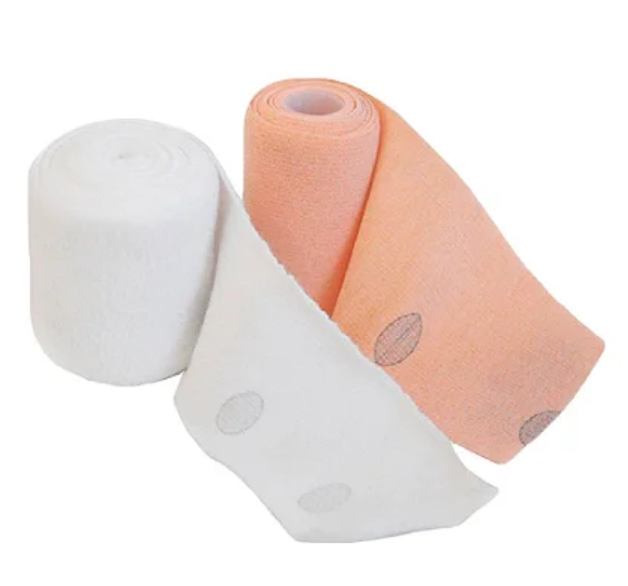
Select the white K-Tech bandage
The UrgoK2 kit is composed of a short-stretch bandage (white - K-Tech) and a long-stretch (beige - K-Press) bandage.
To start, pick up K-Tech, the white short-stretch bandage and open it.
The white bandage should be applied on the leg first, then the beige bandage will come on top.
of
Apply on foot
How to hold the bandage roll?
Apply the white K-Tech bandage positioning the roll upward (pressure indicators visible).
18-25cm kit – Start with the pressure indicators facing away from the toes (facing the patient).
25-32cm kit – The pressure indicators are placed in the centre.
How to apply?
Start at the base of the toes with one or two turns. Apply a moderate stretch, based on your own clinical judgement (vascular status, foot shape and presence of oedema), without applying excessive pressure to prevent any slippage.
of
Apply on foot
How to hold the bandage roll?
Apply the white K-Tech bandage positioning the roll upward (pressure indicators visible).
18-25cm kit – Start with the pressure indicators placed towards the patient’s toes (facing you).
25-32cm kit – The pressure indicators are placed in the centre.
How to apply?
Start at the base of the toes with one or two turns. Apply a moderate stretch, based on your own clinical judgement (vascular status, foot shape and presence of oedema), without applying excessive pressure to prevent any slippage.
of
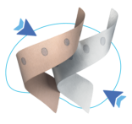
Cover the heel with a figure 8
Secure the heel by applying a figure of 8 around the ankle, ensuring the heel is completely covered.
of
Cover the heel with a figure 8
Secure the heel by applying a figure of 8 around the ankle, ensuring the heel is completely covered.
of
The right stretch
Make sure you achieve the correct stretch using the pressure indicators: from rugby ball to football shape.
Steps
The PresSure indicators should be pointing towards the bottom
of
The right stretch
Make sure you achieve the correct stretch using the pressure indicators: from rugby ball to football shape.
of
The right overlap
For the 18-25cm kit, achieve a 50% overlap.
For the 25-32cm kit, achieve a 2/3 overlap.
Steps
The PresSure indicators should be fully covered by the overlaps of the bandage.
of
The right overlap
For the 18-25cm kit, achieve a 50% overlap.
For the 25-32cm kit, achieve a 2/3 overlap.
These overlaps should fully cover the pressure indicators.
of
Bandaging the leg
After the ankle, bandage up to the knee in a spiral, achieving the correct stretch and overlap.
Steps
The PresSure indicators should be fully covered by the overlaps of the bandage.
of
Bandaging the leg
From the ankle, bandage the leg up to the knee in spirals, using the pressure indicators as a guide for the correct stretch and overlap, as in previous steps.
of
Stop below knee & cut excess bandage
Finish 2 cm below the back of the knee and cut off any excess bandage.
Steps
Bandaging should stop at the 'Tibial Tuberosity’, ending at the back of the knee one or two fingers lower than the popliteal fossa.
of
Stop below knee & cut excess bandage
Finish 2 cm below the back of the knee and cut off any excess bandage.
Steps
Bandaging should stop at the 'Tibial Tuberosity’, ending at the back of the knee one or two fingers lower than the popliteal fossa.
of
Where to start the 2nd bandage
For patient comfort, allow a small border of layer 1 (K-Tech the white bandage) at the toes before applying K-Press, the 2nd beige bandage.
of
Where to start the 2nd bandage
For patient comfort, allow a small border of layer 1 (K-Tech the white bandage) at the toes before applying K-Press, the 2nd beige bandage.
of
Apply the 2nd bandage
Apply the K-Press bandage (beige long-stretch bandage) - on top of K-Tech bandage using the same technique.
Steps
To apply the correct tension, stretch the bandage fully and ensure that the oval becomes a circle.


To achieve the correct overlap, cover pressure indicators so that 50% of the previous wrap is covered for the 18-25cm kit, or 2/3 for the 25-32cm kit.
of
Apply the 2nd bandage
Apply the K-Press bandage (beige long-stretch bandage) - on top of K-Tech bandage using the same technique.
Steps
To apply the correct tension, stretch the bandage fully and ensure that the oval becomes a circle.
To achieve the correct overlap, cover pressure indicators so that 50% of the previous wrap is covered for the 18-25cm kit, or 2/3 for the 25-32cm kit.
For the 18-25cm kit, the pressure spot indicators should remain visible.
of
Stop below knee
Here again for patient comfort, allow a small border of layer 1 (K-Tech the white bandage) at the top. Cut off any excess bandage.
of
Stop below knee
Here again for patient comfort, allow a small border of layer 1 (K-Tech the white bandage) at the top. Cut off any excess bandage.
of
Secure cohesion
Apply gentle pressure with the hands along the leg to ensure correct cohesion of the 2nd bandage
of
Secure cohesion
Apply gentle pressure with the hands along the leg to ensure correct cohesion of the 2nd bandage
of
Check your bandage
When you’re finished, check the back of the leg to make sure the bandages are correctly applied and ask your patient if the bandages feel comfortable.

Steps
What about the other leg?
A patient treated for a venous leg ulcer or mixed leg ulcer with bandages on one leg might be at risk of developing one on the other leg in the future. To prevent this, wearing appropriate compression hosiery is recommended.
Learn more about our hosiery range on https://www.urgomedical.co.uk/ and https://measurego.co.uk/.